Monochrome Camera
WHAT IS A ‘DEBAYERED CAMERA’ ?
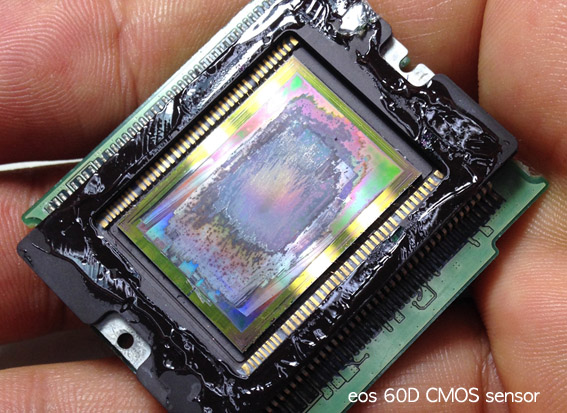
To convert the color image sensor of a generic digital camera to a monochrome sensor, we must remove the bayer filter layer(= Color Filter Array=CFA) on the image sensor. This is called “Debayering”.
To convert the color image sensor of a generic digital camera to a monochrome sensor, we must remove the bayer filter layer(= Color Filter Array=CFA) on the image sensor. This is called “Debayering”.

The launch of Sony’s A7s this year is remarkable because of it’s very good low light performance and 4K movie mode with it’s Full Frame image sensor.
The A7s 12 megapixels is small compared to other full frame digital cameras but this camera is special to amateur astronomers because of it’s ultra high iso (up to 409,600).
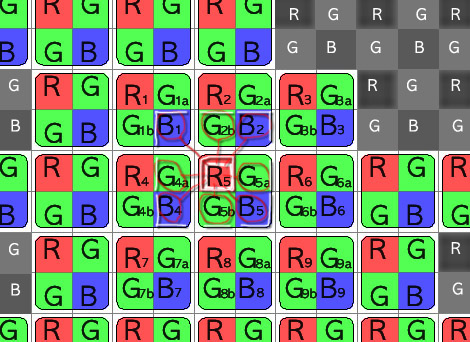
Generally color image sensor is arranged as the pattern of RGBG 2×2 pixels color filter array, It can make the color images through 1 shot exposure but the large amount of light were blocked by color filters on CMOS and color processing algorithm produce false colors. The optical low pass filter to prevent false color on color image sensor makes lower resolutions to output image.
In low light photography field B/W sensor with high QE and low noise is most valid device for higher resolution image. Read more

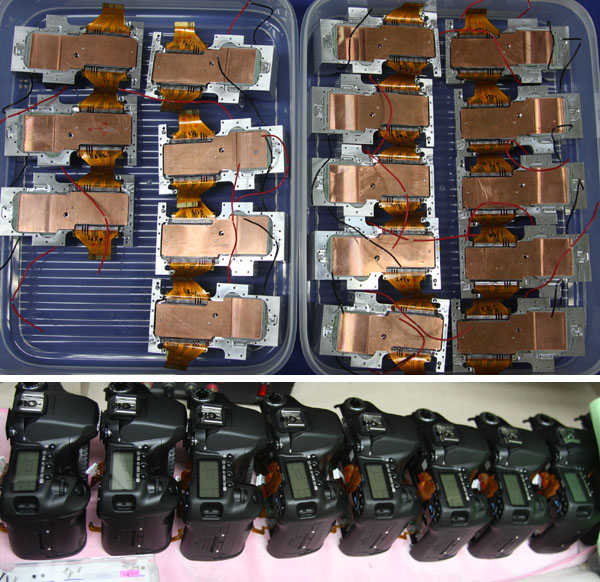
Astro 350D Modifying Process( 3 ) Process-1 ☞ Process-2 ☞
12.assembling airtight chamber to the camera

Use screw 1-6 to fix airtight chamber to camera. First put optic axis levelness coreection washer then use 1-3 screws to fix it.
There are three 1mm diameter holes in green circle in a picture. This is for leveler‘s three legs checking CMOS levelness with optic axis.
Astro 350D Modifying Process( 2 ) Process-1 ☞ Process-3 ☞
7.making mainboard’s USB extenasion cable

Remove miniUSB connector from mainboard using soldering iron. Then attach extenansion cable at 2cm length firmly so it won’t fall.
Astro 350D Modifying Process( I ) Process-2 ☞ Process-3 ☞
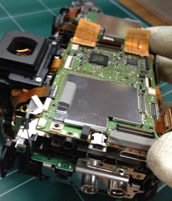
1.start…..opening the camera
First remove camera’s CF memory and battery, then loosen screws, two of them at left of the camera, three of them at right CF slot, and three of them at bottom of the camera. open the back cover carefully. You’ll see two FPCB cables connected to the mainboard at rearside of the LCD. Unlock the connector’s locking device and easily pull it. It’ll separate easily.
Keeping the back cover opened, if you look at leftside you’ll see three jacks – USB, AVout, and Remote control, as in pictures. all these will have to be replaced to put the airtight chamber.

2.separating mainboard